Included in the shipment
- Gateway devices – at least 2
- USB wireless devices for rack controllers – one for each rack to be connected to RackNet
- Envelope containing USB flash drives for rack controller update and configuration
Gateway Setup
What is needed
- The Gateway
- Ethernet cable – if using a local network to connect the gateway to the RackNet service.
Included with the Gateway
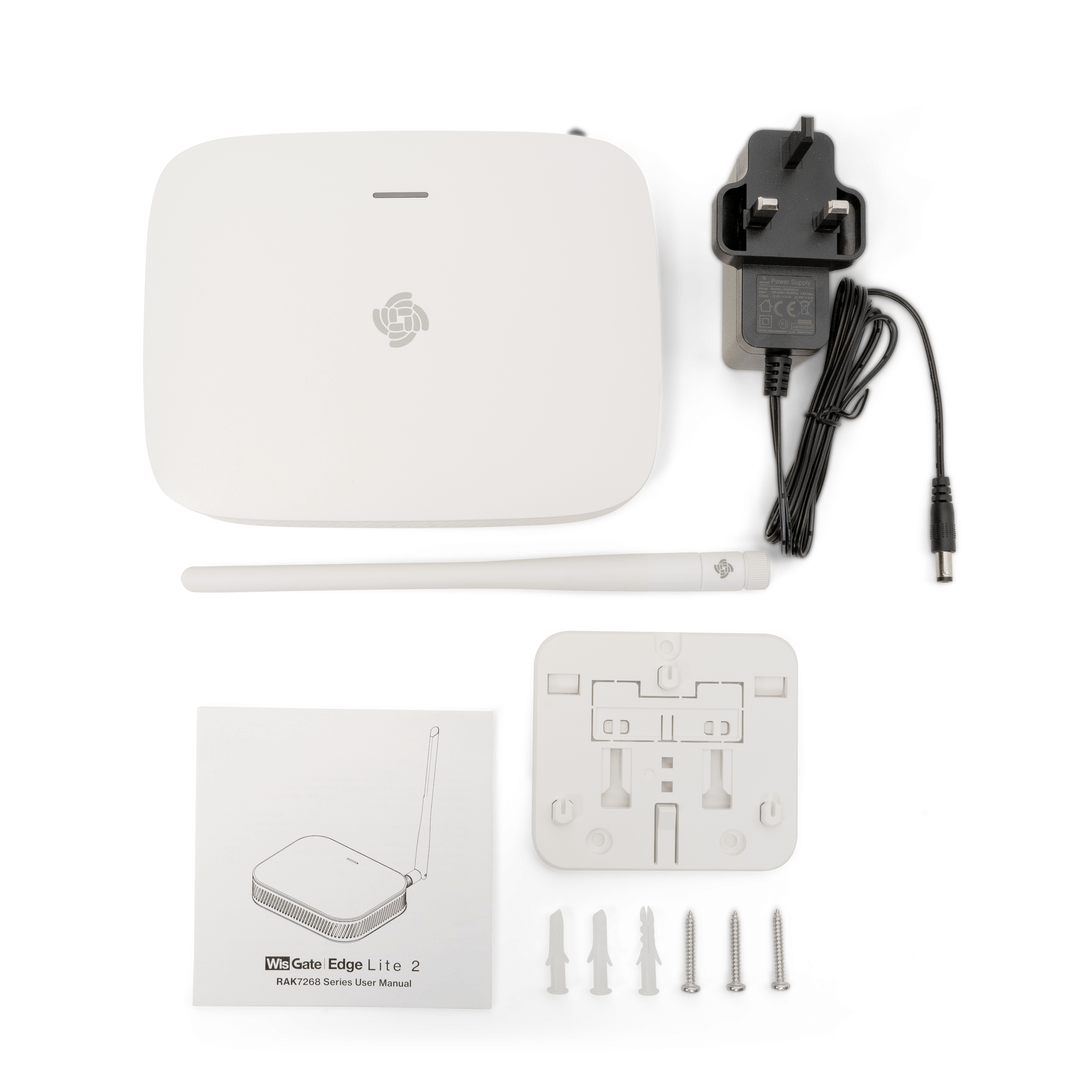
Note: The power supply included may be different than pictured, depending on your country or region.
Placement
The gateway supports being placed on a flat surface as well as wall, ceiling, and rail mounting. Refer to the manufacturers quick start guide for mounting instructions.
Antenna
Attach the antenna by screwing it into the connector on the Gateway. Do not power up the Gateway without first attaching the antenna.
Connecting to the Network
If the gateway will be connected to the local network to access the RackNet service, connect the gateway to the local network using an Ethernet cable. The gateway is configured to use DHCP to obtain an IP address. It is recommended to use a reserved DHCP address for the gateway, and the gateway MAC address should be supplied with you RackNet documents.
If you are using the cellular version of the gateway you will not need a local network connection. The SIM card and cellular connection are already configured and activated. The gateway will connect to the network automatically upon startup.
Power on the Gateway
The gateway can be powered using either Power over Ethernet (PoE) or the included power supply. Do not use both. The LEDs on the back of the gateway will indicate the status of each function. The LED o the top of the gateway will turn <describe>
Once started, the gateway will automatically connect to the RackNet service.
Controller Setup

USB Wireless Device
Unbox a USB wireless device and attach the included antenna.
Controller Update and Configuration
USB Flash Drives
There should be 4 USB flash drives, labeled similar to:
- V1 Controller Update
- V1 RackNet
- V2 Controller Update
- V2 RackNet
Controller Generation
The V1 or V2 refers to the controller generation. To determine the controller generation…
As a general rule:
- Any controller with a built-in antenna is a V1 controller
- Any controller with a USB an Edimax USB WiFi device is a V1 controller
- Any rack received after March 2021 is very likely a V2 controlller
To display the controller version in the rack controller:
- Press the bottom two buttons on the controller for 3-4 seconds to display the settings screens
- Navigate to the “Controller” screen (or “Controller info” if the software is very old)
- Find the “Controller version” value
- A version value starting with 1 is a V1 controller
- A version value starting with 2 is a V2 controller
Update and Configure

The procedure for updating then configuring controllers is the same:
- Install the Controller Update by inserting the update drive into the controller.
- Install the RackNet configuration by inserting RackNet drive into the controller.
- Insert the new white USB wireless device with the large antenna into the controller. The installed USB wireless device will look like the image to the right.
- It is preferable the antenna point up, but if this is not possible due to the length of the cable, pointing down will work.
For V1 controllers:
- Before the update and RackNet configuration, restart the controller
- After the update and RackNet configuration, restart the controller
Verification
- Go back into the settings screens (press bottom two buttons for 3-4 seconds)
- Navigate to the Network Info screen
- Verify some of the information — it may take a few minutes to populate this information:
- Dev EUI should be populated (it will match the Dev EUI on the white device)
- Joined should indicate: Yes (the LED on the USB wireless device flashing green indicates successfully joining the network
- Version should be: 1.0.3+67 – this is the RackNet “plugin” version in the controller
- The RackNet plugin version will be the same for both V1 and V2 controllers
- The controller should appear in the RackNet web interface after a few minutes
- The controller will have to be assigned to the correct room after it appears in the RackNet web interface
Preparing for Use
As the racks are configured for the RackNet service, note the controller serial number in the “Controller” screen, as well as the rack name and location (Room A – Rack 3, for example). The racks will initially be unknown to RackNet, and will need to be updated in RackNet to reflect the proper name and location.
Configure the RackNet Service
To access the RackNet service, visit: https://racknet.app
Note: You must have admin privileges to configure locations and racks.
Configure Locations
Click Locations in the left menu. If you need to add locations, use the red “+” button. Locations can be configured to an arbitrary depth. You may have a simple flat hierarchy, such as:
- Room 1
- Room 2
- Room 3
Or you might need to configure multiple levels:
- Building A
- Level 1
- Room A1-1
- Room A1-2
- Level 2
- Room A2-1
- Room A2-2
- Level 1
- Building B
- Room B1
- Room B2
Configure your locations as needed based on your facility.
Configure Racks
Initially racks will all be listed under the location “Location Unknown” and referenced only by the controller serial number.
- Click the serial number or the gear icon to view the Rack Details page.
- Click the pencil icon in the upper right corner of the page to edit the rack description (name) and location. Use the information gathered when configuring the racks, as mentioned above.
- When done, click the green check icon.
Using RackNet
Rack information will start to populate in RackNet after the racks have been configured and the USB wireless device is inserted. It will take a few minutes for rack airflow data to appear.
Events and Timing
- Rack startup – only sent on rack controller startup
- Racks will “check in” every 5 minutes: Rack controller registered with server
- After rack startup, there will be a few “register” requests as the rack controller sends rack information to RackNet
- Rack send their airflow configuration on startup: Rack airflow limits received
- Racks will send airflow data every 5 minutes: Airflow data received
- For a double side rack, the sides are sent separately 30 seconds apart
Alerts
Any alerts generated by the rack controller or within RackNet will be emailed to admin users of the system.
Coming soon: SMS alerts
Viewing Events
The most recent events for a rack are visible in the rack details screen. Click on the rack name or the gear icon. For a more comprehensive list of events, click Events in the left menu.
Viewing Alerts
The most recent alerts for a rack are visible in the rack details screen. Click on the rack name or the gear icon. For a more comprehensive list of alerts, click Alerts in the left menu.